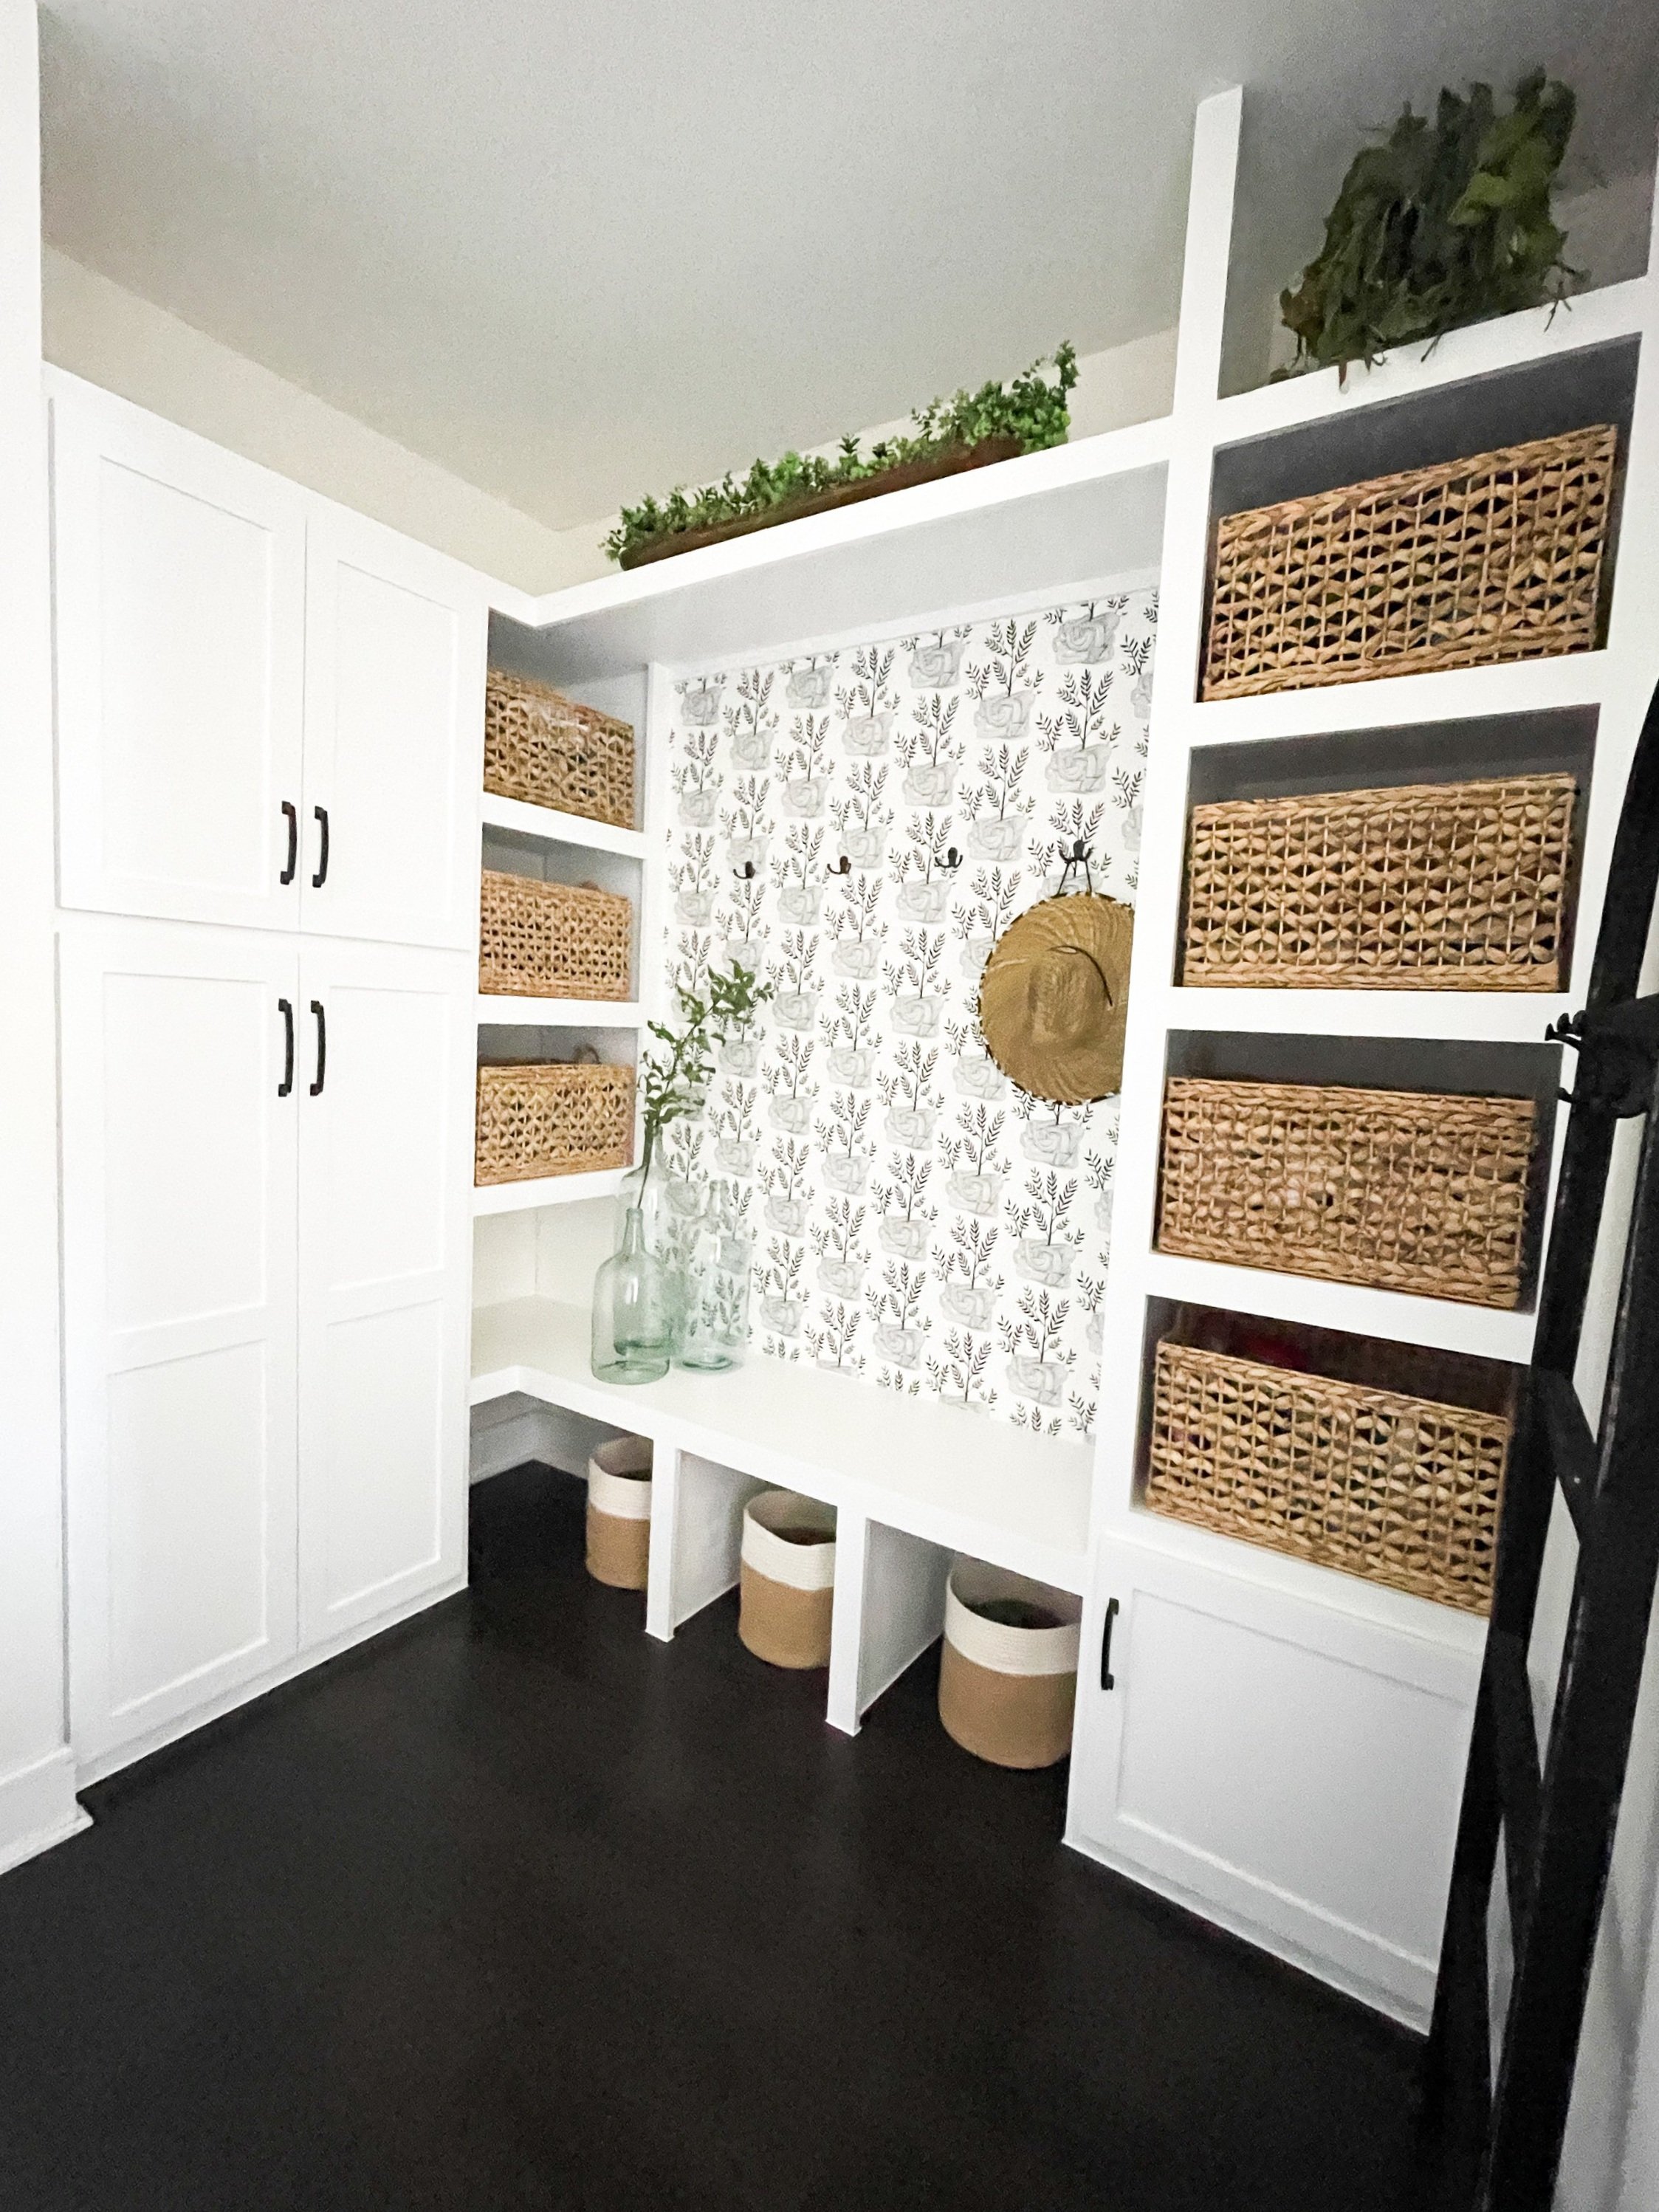
DIY Mudroom Transformation
Create built-ins for your mudroom for under $2K!

Featuring recycled glass jars and large dough bowl from Sand & Pine Co.
AFTER…
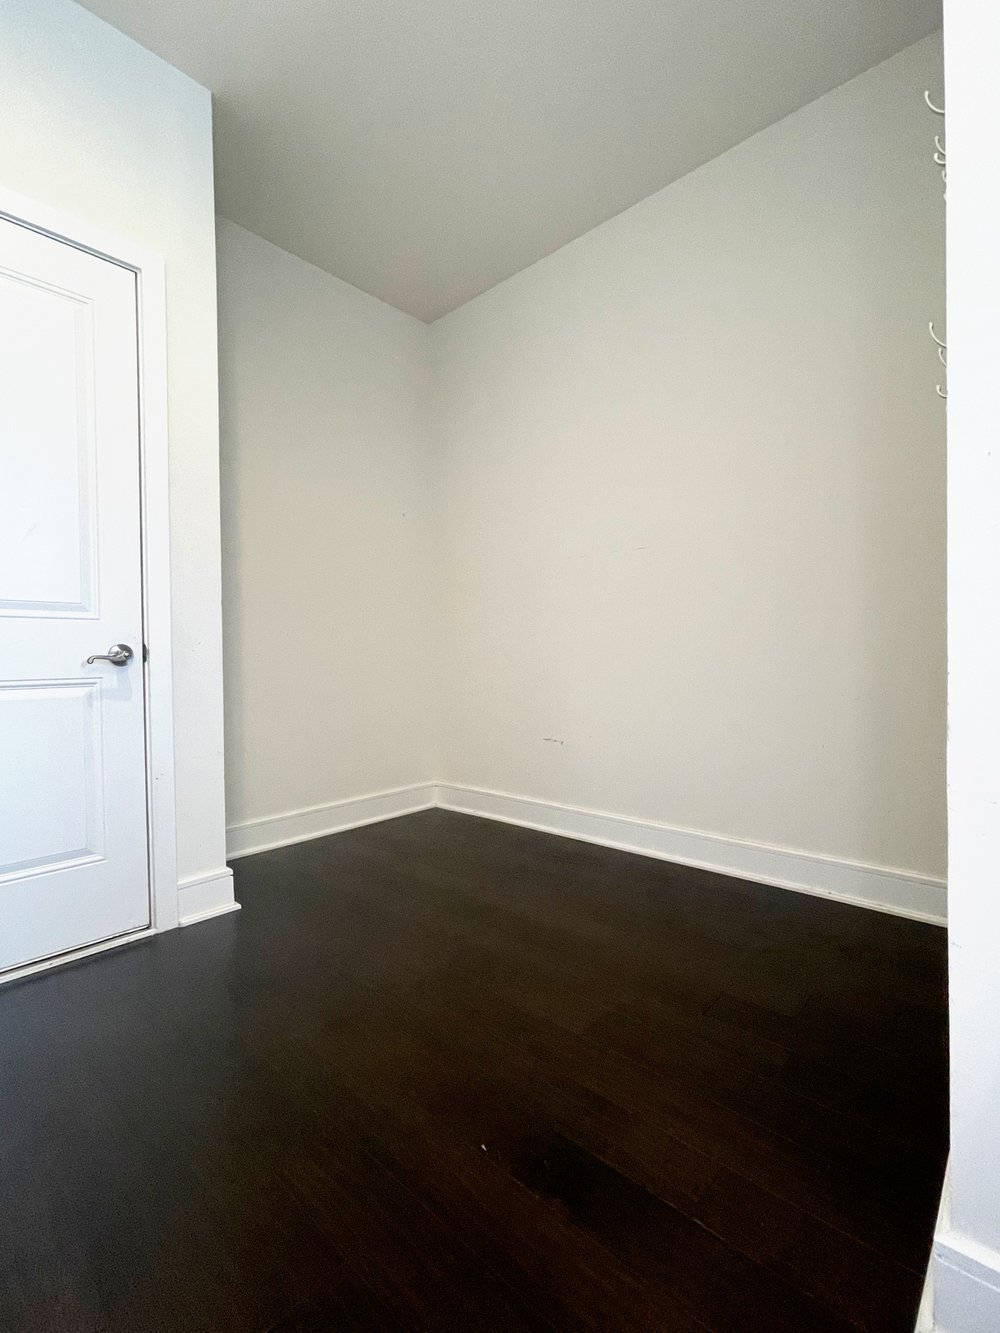
BEFORE…
I was tired of getting quotes of $6-10K for my mudroom, so I went to the drawing board and came up with a simple design that I could execute. I had inspiration from one of my favorite blogs, Frills and Drills – DIY Built In Mudroom.
My biggest costs in the project were the plywood and the custom cabinet doors.
Supply List:
Screws
Nails and Nail Gun
Tape Measure
Level (I like the RYOBI Laser Cube Compact Laser Level)
Clamps
Miter saw
1x3x8 Common Board
Sander (I like the Black and Decker Orbital Sander)
Nail Hole Putty, Paint, Caulk
Custom Cabinet Doors (I used Cabinet Discounters)
Wallpaper and Wallpaper Kit
1. Planning the Space
I started the project by measuring the space and drawing out a rudimentary design on paper. Standard bench depth is between 15-20in, so I ripped my plywood at 17in, with 1in trim, making it a depth of 18in. Standard bench height is between 18-20in, so I cut the ripped boards at a height of 19in, leaving 1in for the plywood top/seat making the bench 20in tall.
I wanted shelving that could accommodate large baskets to hide all of our stuff, so I made them 14in tall by 20in wide.
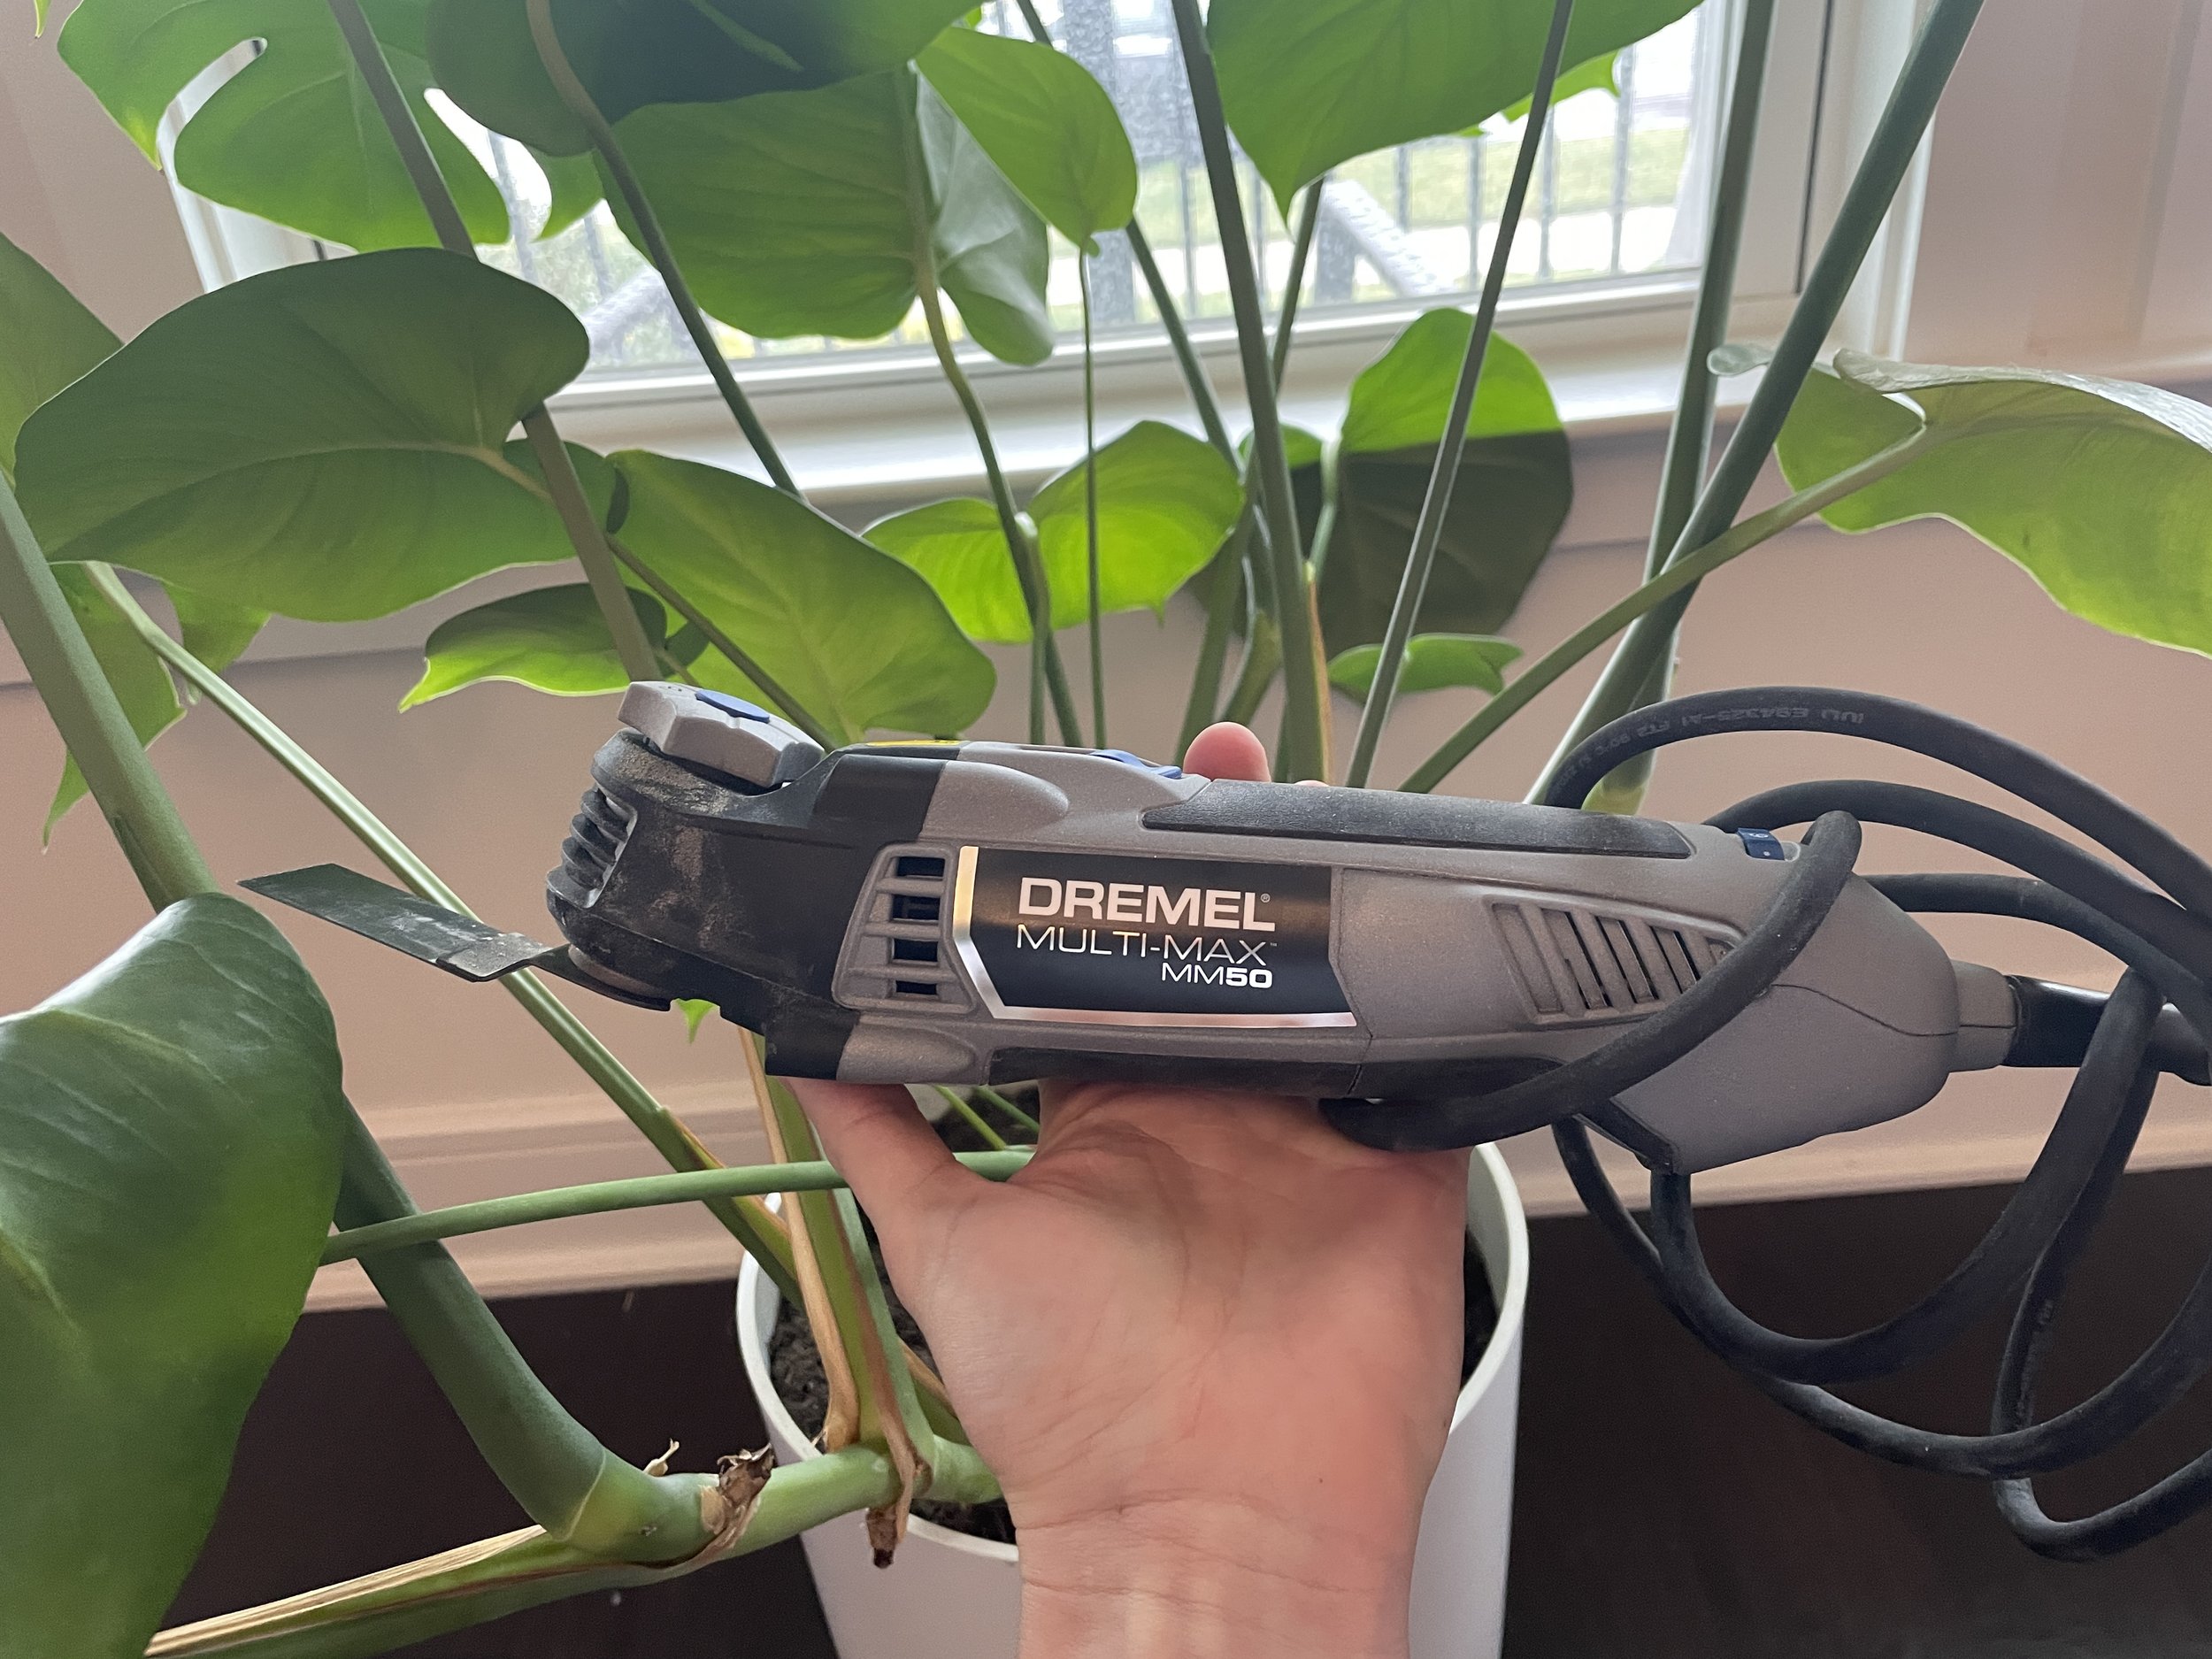
2. The Baseboards
I started by cutting out 3/4in gaps in the baseboards using the Dremel Multi-Max multitool. The multitool made it really easy to make the bench board fit tightly into the baseboards, providing a lot of support for the built-ins.
3. Preparing the built-ins
I used a circular saw and rip guide to make all of the bench and shelving pieces uniform. I ripped the plywood into 17in pieces, then cut them to the correct height. I opted for a circular saw and rip guide as opposed to a table saw because as a beginner, I feel more comfortable keeping my hands away from a circular saw blade than a table saw blade.


Circular Saw and Rip Guide
After ripping the 17in boards and then cutting them to the appropriate height, I used a pocket hole jig to hide the screws in the shelves and bench. The Kreg Pocket-Hole Jig 520PRO with Starter Screw Kit was really easy to use. It was my first time creating pocket holes, and the jig made is simple and easy.

Pocket Hole Jig
3. The Shelving
To make the sides of the shelves, I used construction adhesive before putting the boards to the wall, then used a nail gun to secure the vertical boards to the walls (I use the Porter-Cable Air Compressor and Pneumatic Nail Gun). For the shelves, I cut the ripped boards to the appropriate width and used my level and clamps to make the shelves level and secured them using the pocket hole screws.
4. The Trim
I finished the fronts of the bench and shelving with 1x3x8ft common board cut to the correct length using a miter saw. I secured the boards to the front of the shelves/bench using the construction adhesive and the nail gun.
5. Finishing Touches
I puttied all the nail holes, the pocket holes, and any gaps between boards to give the bench and shelves a professional looking finish. After puttying, I sanded using the orbital sander.
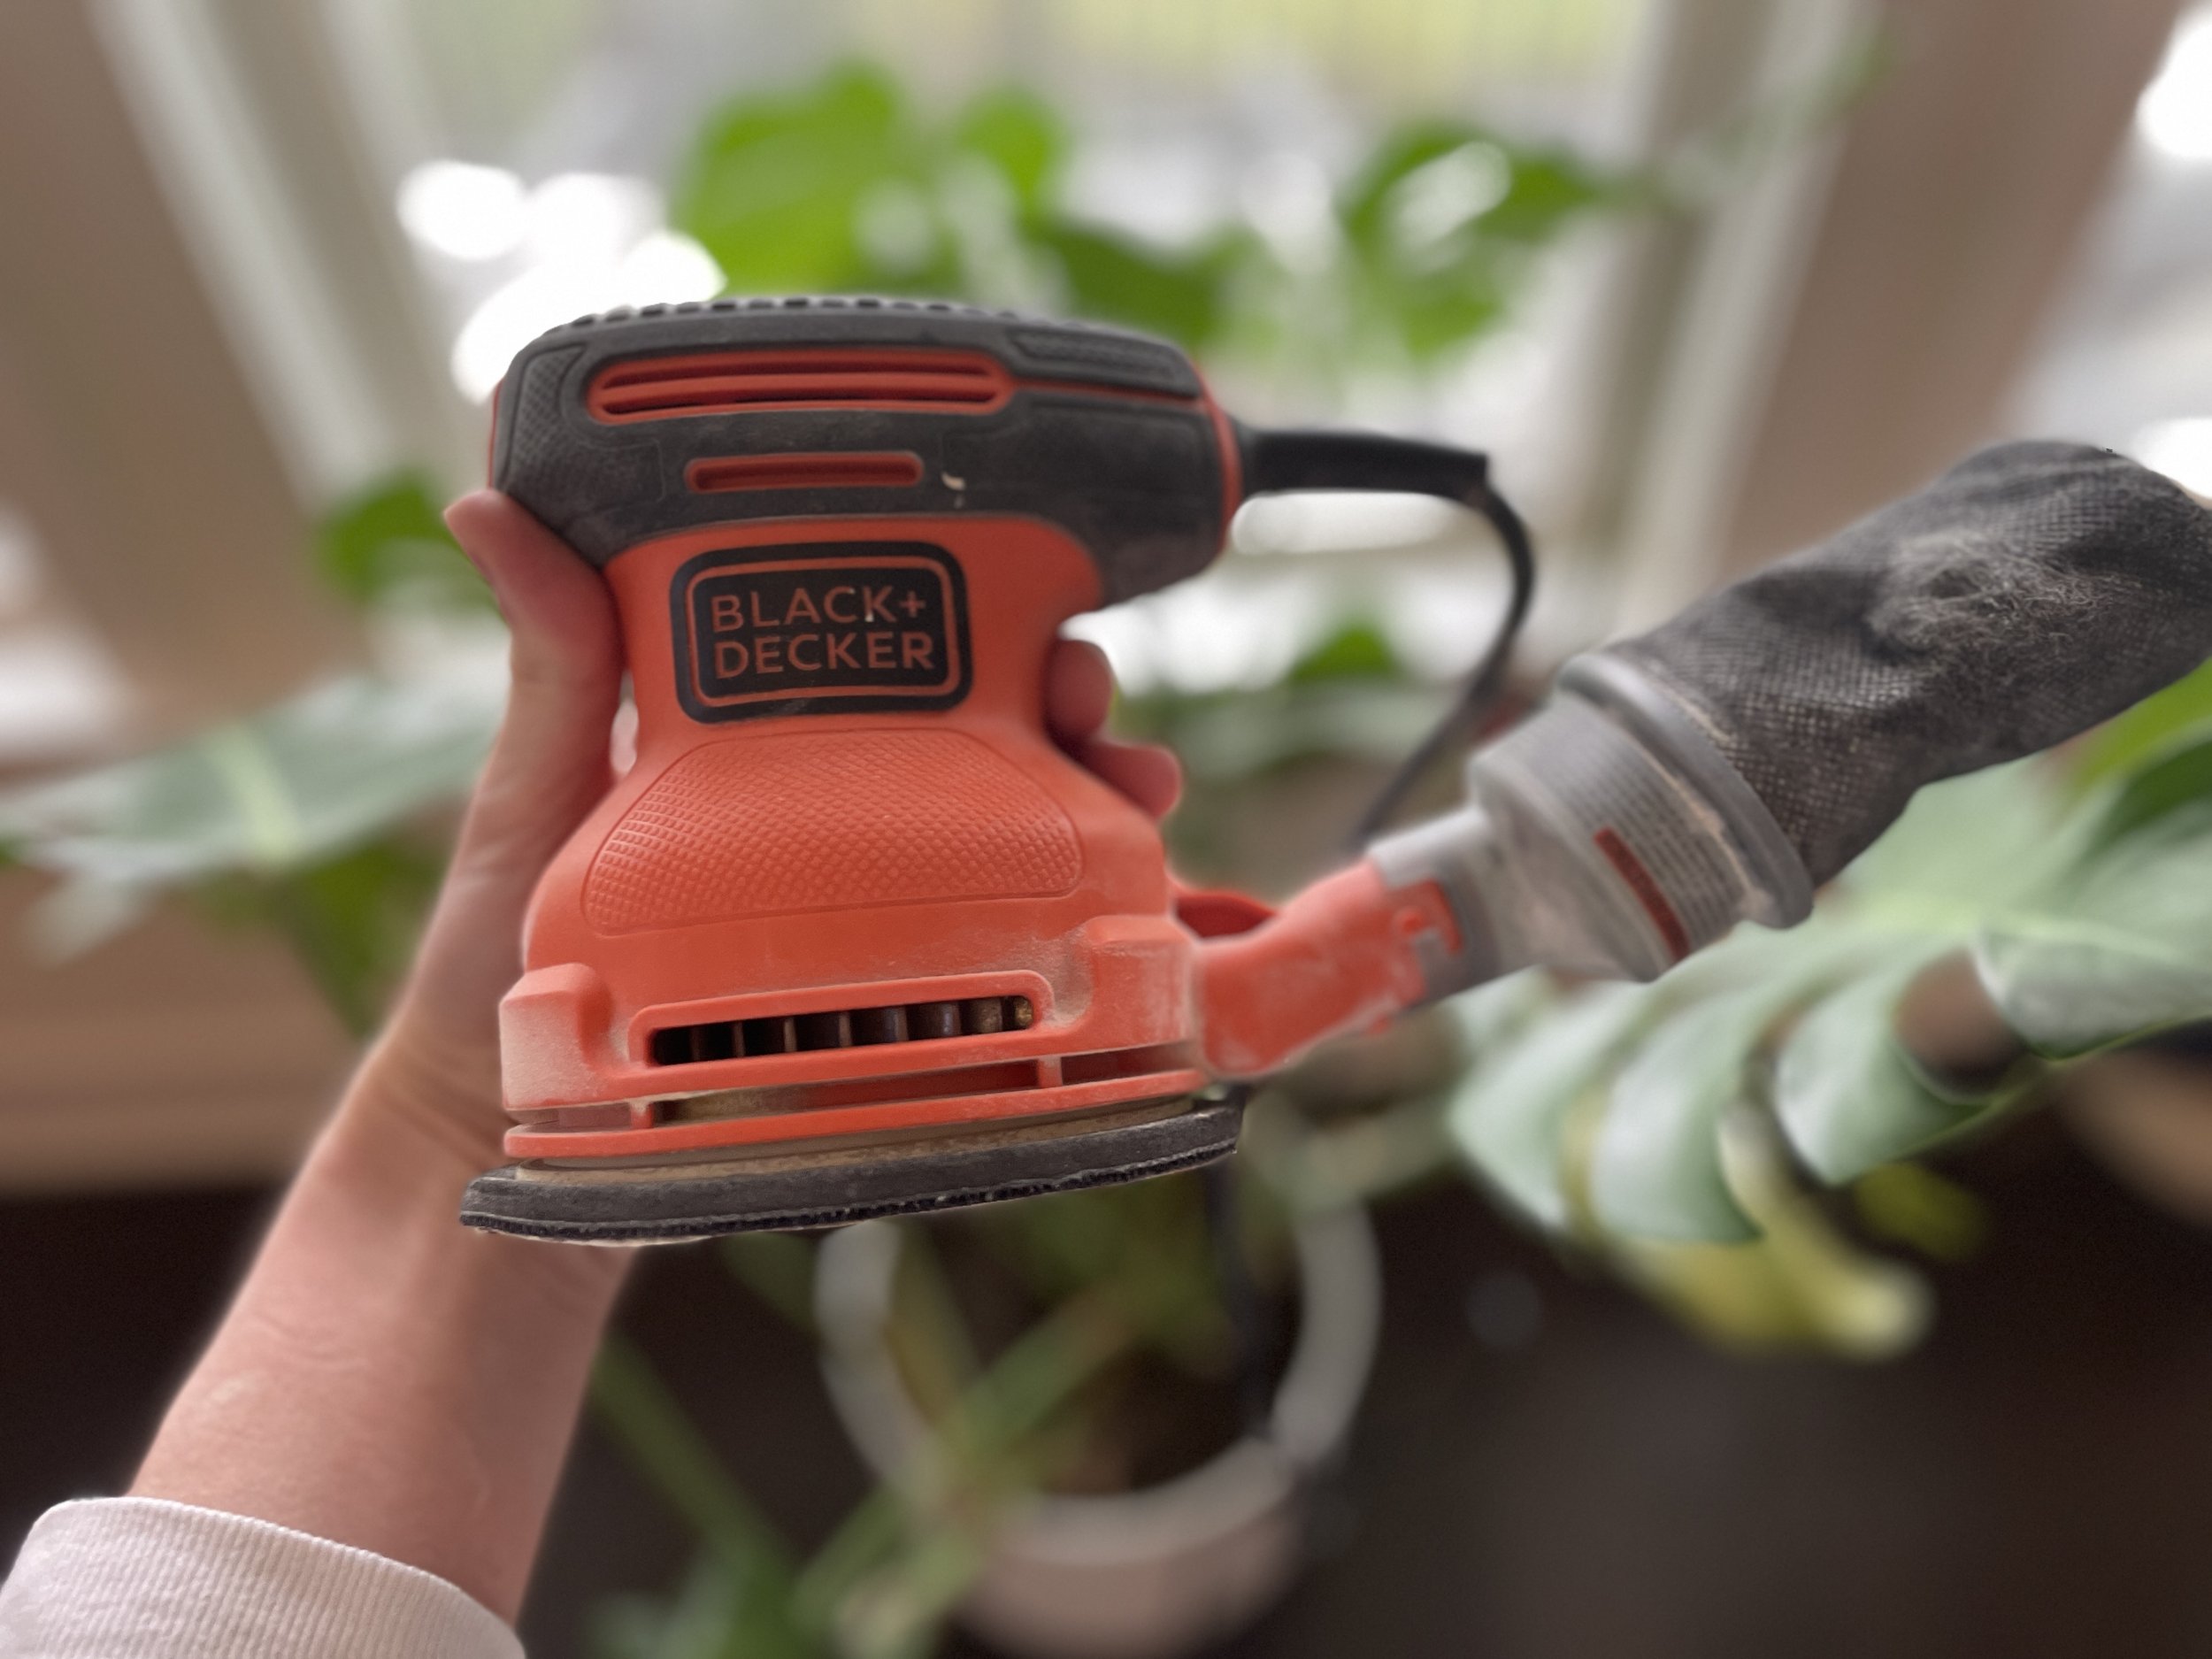
After sanding, I applied my paint. I used a white semi-gloss paint that matched my kitchen cabinets and baseboards so that the built-ins would look cohesive. Some use a paint sprayer for ease of application, but I opted for a good old paint brush because that’s what I had, and I didn’t want to buy a sprayer. It took 3 coats of semi-gloss paint to get a nice finished look.
To create that really polished looked after painting, I caulked all the surfaces where the wood touched the wall and floor (for the floor, I used painter’s tape to make sure it was a clean, crisp caulk line because of the stark contrast between the white shelves and the floor).
In the center area of the wall with the hooks, I wanted to use wallpaper to avoid wear and tear on the wall where the kids will hang their coats and towels. I found beautiful peel and stick wallpaper at Home Depot. I use a cheap wallpaper kit to help smooth out the paper as I go - they sell one for less than $6 on amazon.
5. The cabinet doors
Custom cabinet doors can be expensive. Luckily, my father-in-law works at Cabinet Discounters in Olney, MD, and was able to hook me up with custom cabinet doors as his Christmas Gift this year (he said that they would typically cost between $1000-1500). If I wanted a more cost-effective option, I could have designed my cabinet door openings using prefabricated shaker door measurements (Home Depot or Lowe’s has affordable options).
6. Final Styling
I like a clean, modern look. I found great baskets at At Home that fit the shelves perfectly. I love incorporating greenery in any room in my house, so I used the large dough bowl from Sand & Pine Co. to put on the top shelf with greenery and put a sprig in the recycled glass jars on the bench.
And here’s the complete DIY video start to finish! Enjoy!
I’d love to hear about your own built-in dos and dont’s - shoot me a comment!
Your DIY Partner in Crime,
Maddie