DIY Kitchen Backsplash
Tips and tricks to transform your kitchen by tiling your own backsplash!

We moved into a new build in 2020, and I didn’t fall in love with the backsplash tile options we were presented during the design consultation, so I opted to wait and do the backsplash after we moved in. I wanted to give the original kitchen some life, by bringing in some modern character pulling in the black/grey accents that were present in the countertops and fixtures. Here’s the Before…

Before…
Supplies for this DIY project:
Tile (Mapleton White 7in x 12in x 10mm Chevron Honed Marble Wall and Floor Mosaic Tile from Home Depot)
Tile Saw
Tile Adhesive
Trowel
Tile spacers
Grout
Grout Float
Tile and Grout Sealer (and sponge to apply sealer and microfiber cloth)
Caulk
Painter’s Tape
Level, tape measure
1. Choosing your tile, tile adhesive, and grout color
I love Home Depot’s selection of tile, and you can choose the price range that fits your budget. For this project, the tile was the most costly of all the supplies. Tile can range from <$1 per square foot to up to $50+ per square foot, so I had to decide the style of the tile, then find the tile that fit in my budget. I chose the Mapleton White 7in x 12in x 10mm Chevron Honed Marble Wall and Floor Mosaic Tile from Home Depot because I loved the modern chevron shape and the bright white color that went with my kitchen cabinets. Home Depot also has a great selection of grout colors with matching caulk. I went with #115 Platinum grout with the matching silicone caulk. The grout comes in different versions - you can get premixed or mix it yourself. I love the premixed products because it is more convenient, so I went with Fusion Pro. The Fusion Pro says that it doesn’t need sealing, but because I was tiling a backsplash which can get wet and dirty, I chose to seal the tile and grout at the end anyway. For tile adhesive, I went with OMNIGrip tile adhesive from Home Depot.
2. Choosing the right trowel for your project
You have to use the correct size/shaped trowel to ensure you have adequate coverage of the tile adhesive and the correct depth of adhesive when you press the tile into the wall/floor. If you don’t apply the right amount of adhesive, water can get behind the tile, you can get crumbling of your adhesive, and your tile could end up coming off the wall. There are a few blogs I like that helped guide which trowel to use (i.e. U vs Square vs V-notched): Choosing the right trowel size for tile: the complete guide and How to Choose Trowel Size for Tile. We installed a mosaic tile, so we used a v-notched trowel:

3. The Tile Saw
Every tile project needs a great cut man. This was my first DIY tile project, so I asked my brother, Drew (experienced cut man for my dad who was a general contractor for many years), to come help and teach me how to use the tile saw. I opted to rent the tile saw from Home Depot. The rental process was easy, and the employee at Home Depot helped me pick the correct size tile saw for my project - I just had to tell him the type and size of my tile. He was very helpful and gave me tips on how to use it before I rented it. The Small and Medium Tile saws rent for about $60 for the day.

My brother, Drew, helping me out!
4. The Tiling Process
We used the V-notched trowel to spread the tile adhesive evenly on our tile and applied the tile to the wall. We used tile spacers to help maintain space between the mosaic tiles. Mosaic tiles do tend to move slightly on the vertical wall due to gravity, but by applying the bottom mosaic tiles first, that helped to maintain spacing as we laid tile up the wall. I used Painter’s Tape to protect the countertop and the cabinets from the adhesive and grout. It took a full day of work to lay the tile. After applying the tile, I waited about 36 hours prior to applying the grout (you want to wait at least 24-48 hours). I used a grout float to apply the premixed grout to the tile. I applied the grout evenly and pressed the grout into each gap between tiles, making sure that each gap was filled completely with grout. I took my time with this to ensure the grout was evenly applied so that it wouldn’t have holes after drying. For this type of project, it definitely pays to SLOW DOWN and do it right the first time.

5. Sealing your tile
Most contractors recommend waiting 48 hours for your grout to dry before you apply your sealer. I used a large sponge to apply the sealer evenly to the tile and grout and then wiped the excess sealer off with a microfiber cloth.

6. Caulking
For a project like this that has really visible caulk lines when guests come to visit, I like to use painter’s tape to create really crisp, clean caulk lines that make the finished look sharp and professional. I taped the countertop, cabinets, and walls to the width that I wanted my caulk line. After running the caulk line, I pulled up the tape immediately so that the caulk did not have time to dry. I let the caulk dry overnight before I let anyone use/clean the counter.

After…
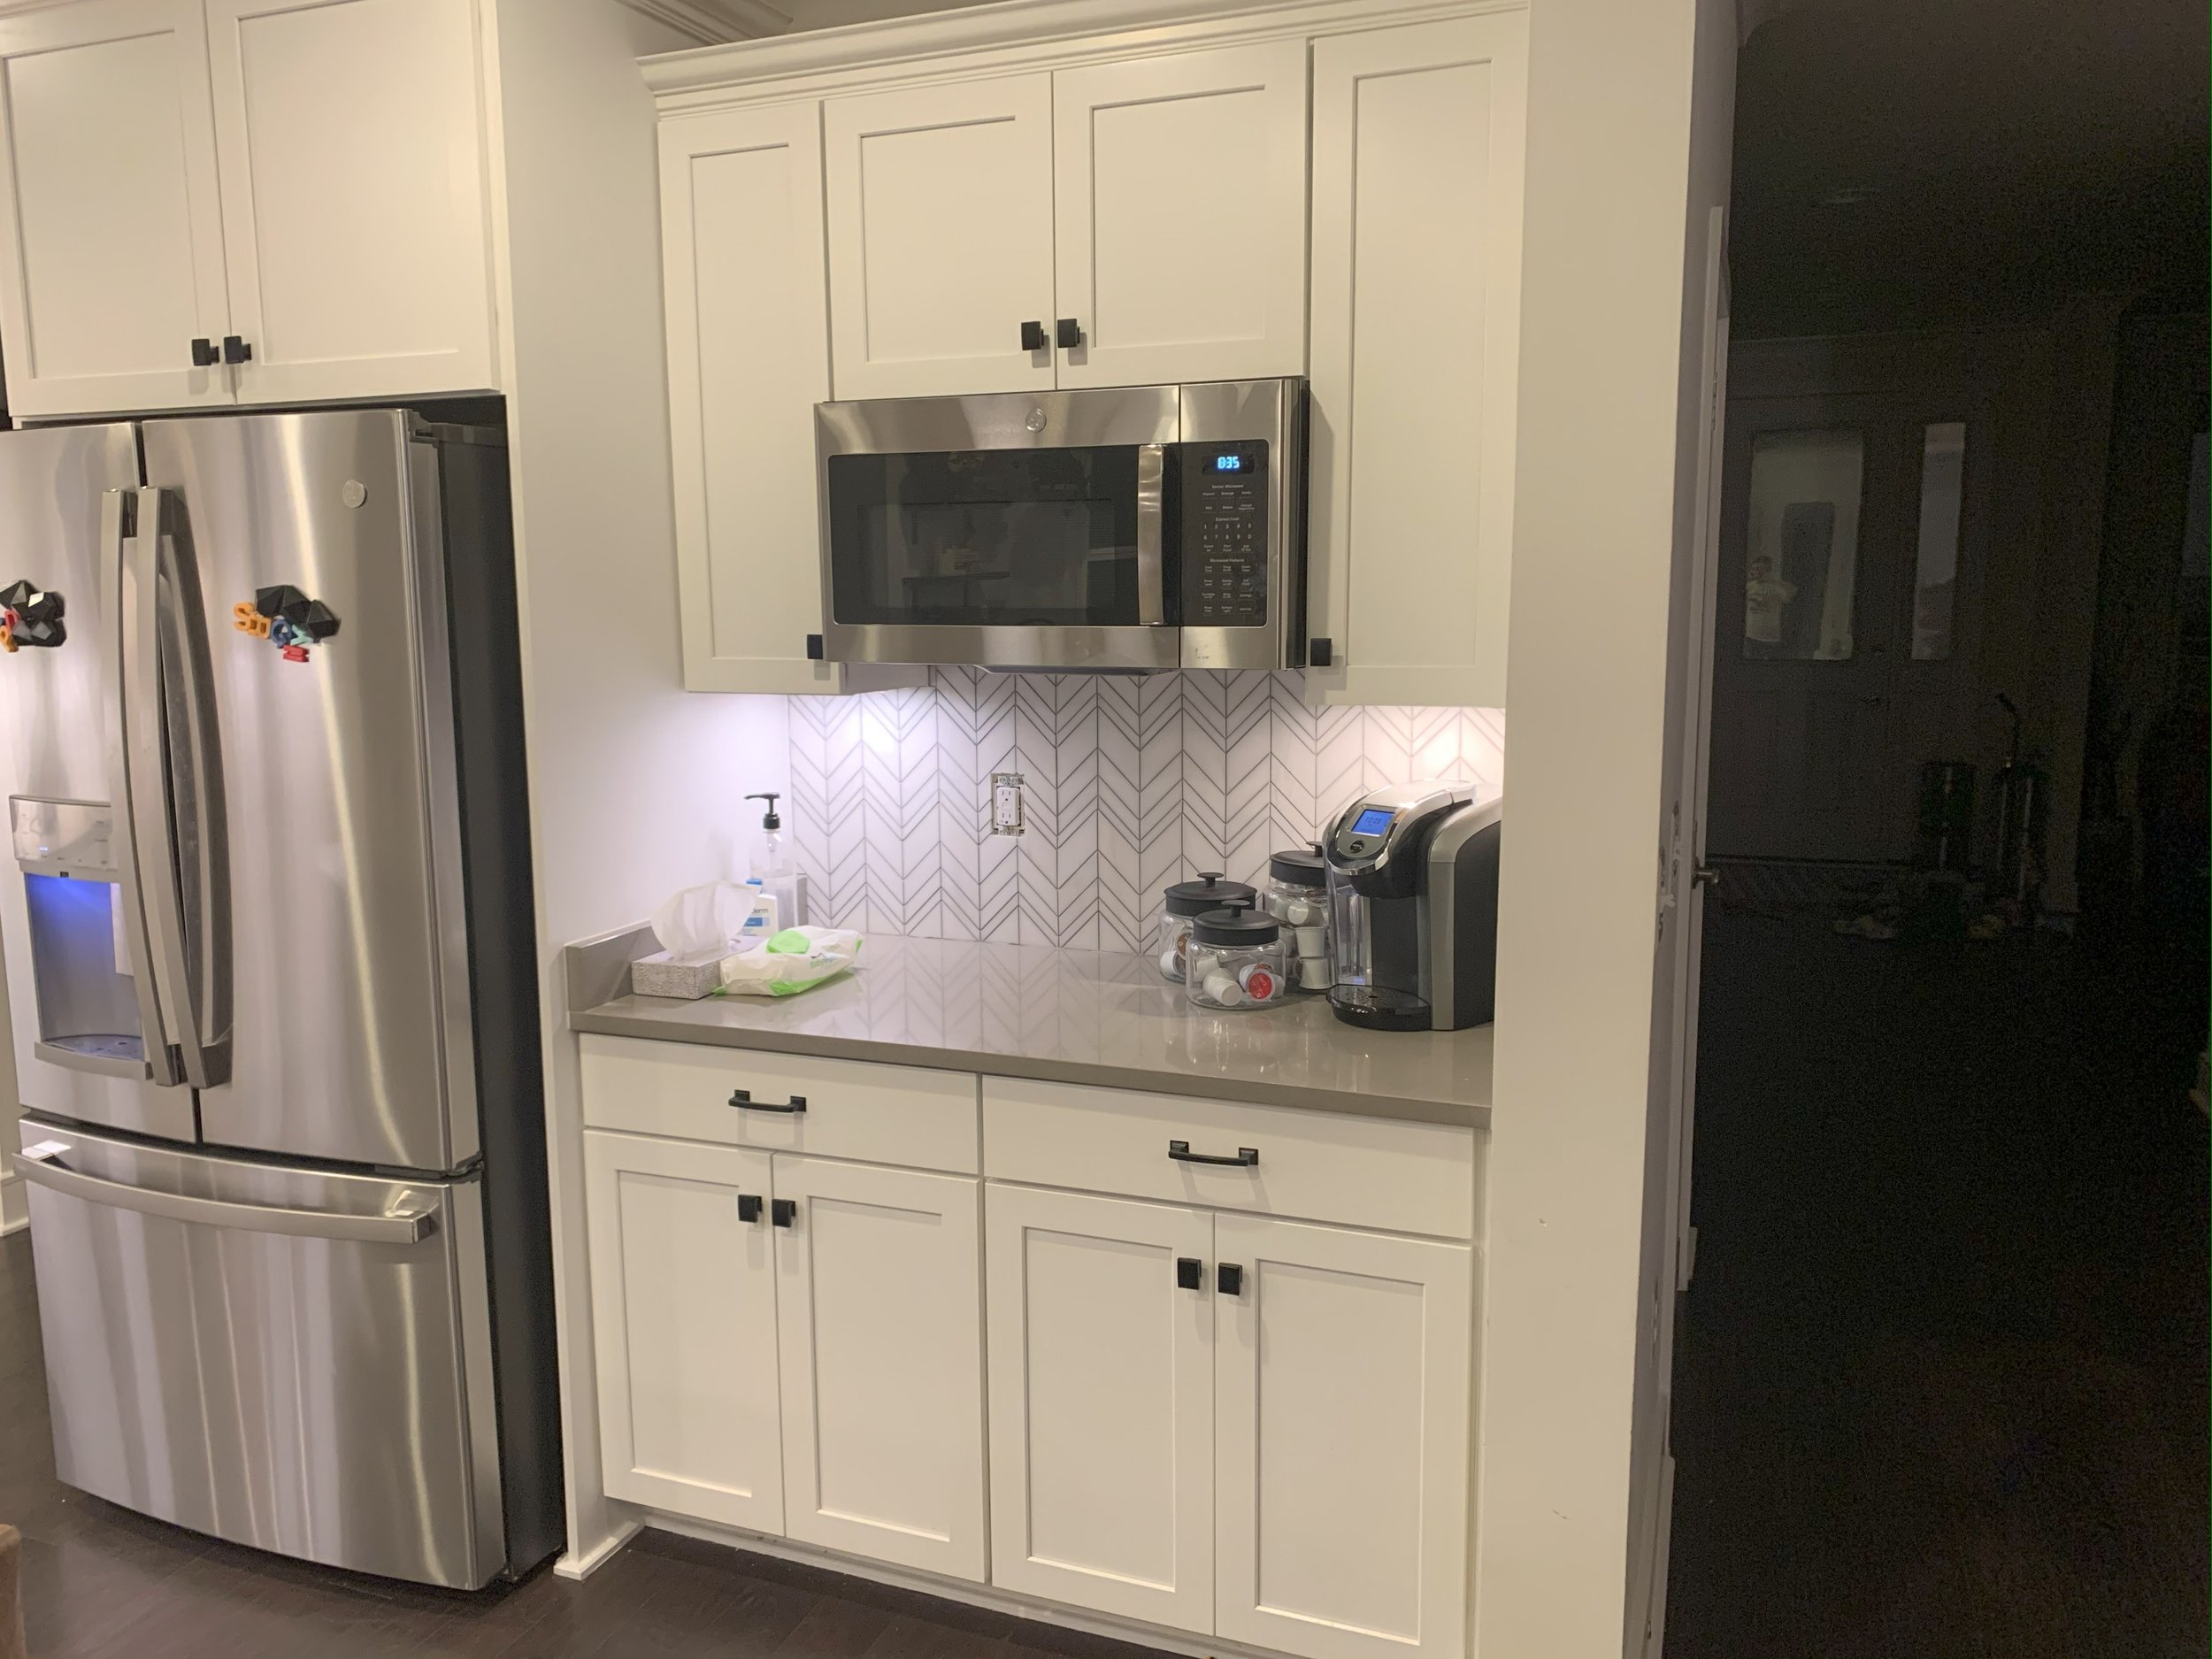
After…
7. Then I had some fun styling it with all our Sand & Pine Co. products!!


The Coffee Bar: Takara Live Edge 2-Tier Riser, Medium Oval Cutting Board and Cloche, Pion Dishware, and Stainless Flatware
Your DIYer in Crime,
Maddie