DIY Bathroom Makeover on a Budget

Featuring our Book Collections, towels, candles, soaps, lotions, cloches, antique-Inspired items, and baskets.

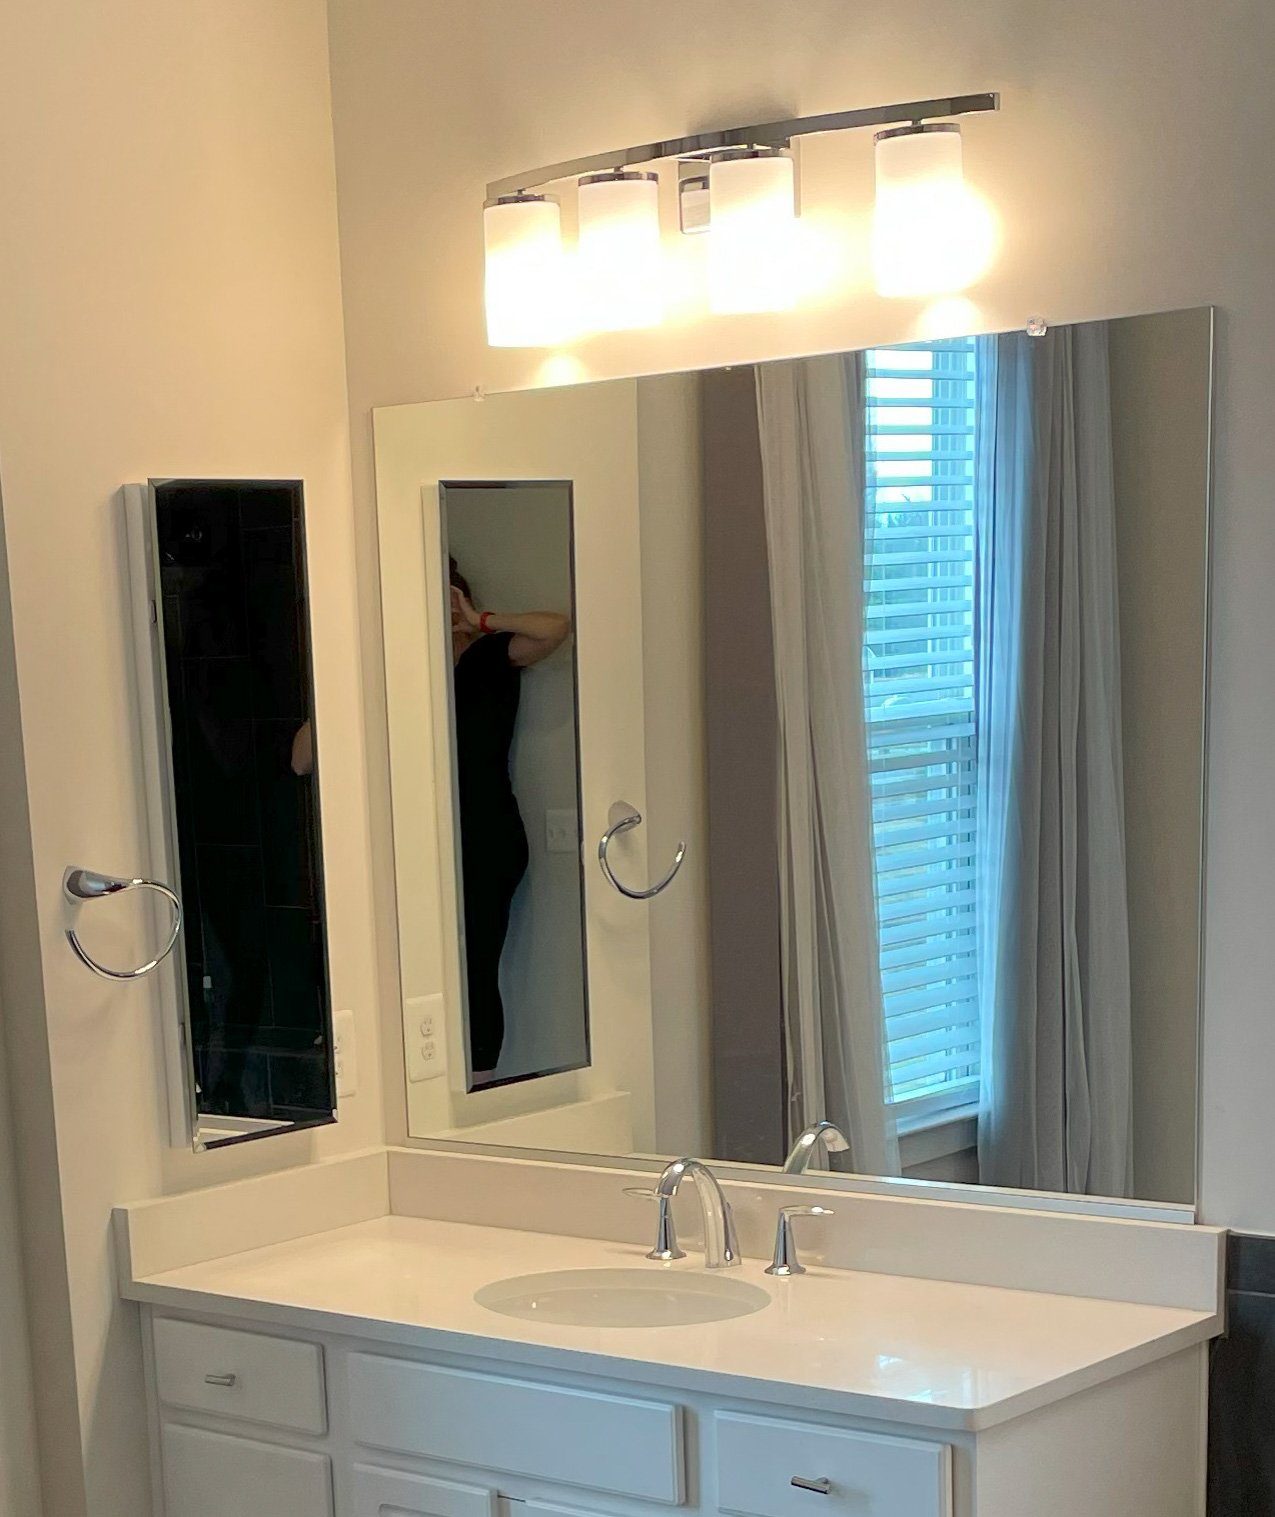
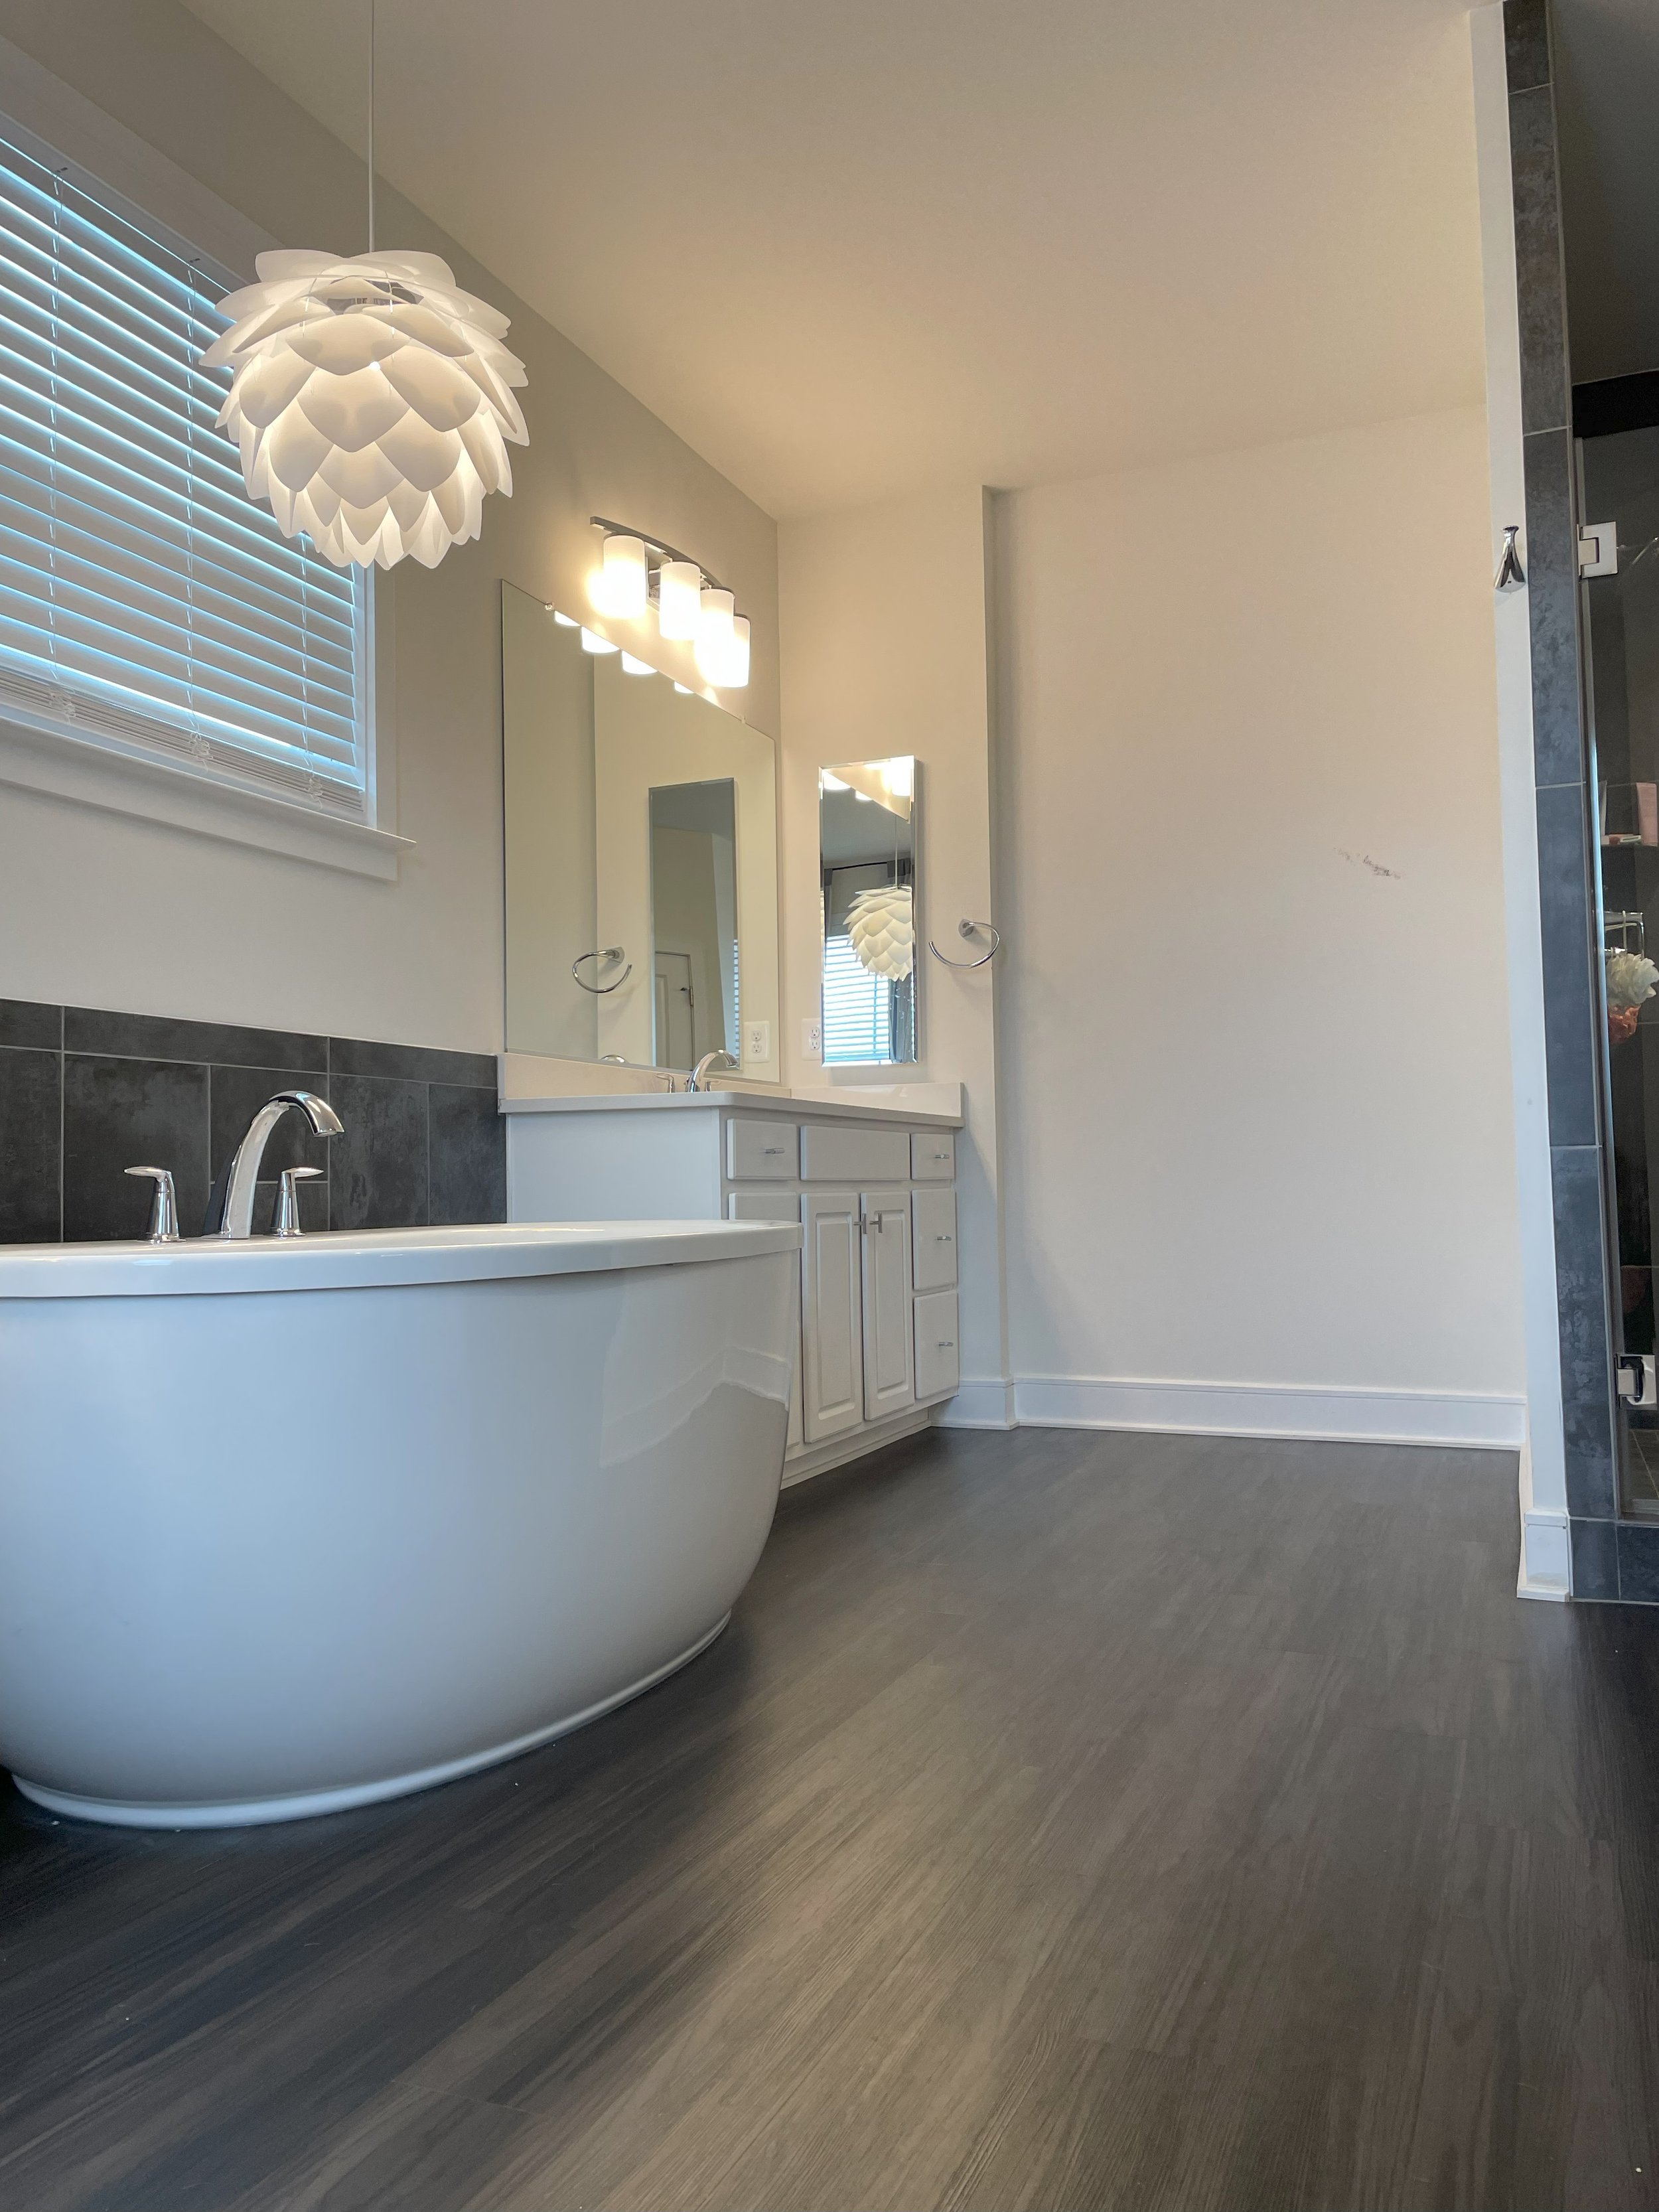
Before…

After…
When we moved into our new house in 2020, I wasn’t sure exactly what I wanted to do with the bathroom. The white walls and chrome fixtures left the space looking sterile. I wanted to bring it to life, but I didn’t want to spend an arm and a leg. I was able to get all the supplies for this project for $750. I decided to focus on a few areas to bring the space to life:
Bathroom Hardware
I thought black fixtures would really transform the space and pull in the black tones from the flooring and tiles. Replacing all the fixtures and door pulls at once can be very costly - it would have cost me $500-1000 to replace everything. Rather than go that route, I decided to go the cheap way - spray paint the chrome fixtures. It gave me the option to swap out the chrome fixtures for black fixtures later. I used BEHR Premium Black Matte Interior/Exterior Spray Paint and Primer in One. I taped off all the faucets and covered the counters and bathtubs with plastic drapes before spraying.
I did purchase black door pulls from Wayfair because they had a great sale, and it was much easier than spray painting them all (and would have cost me almost the same as the spray paint to paint them all).
Replace the Light Fixtures and Mirrors
By simply replacing the light fixtures and mirrors, it really made the space look more modern. The light fixtures and mirrors were the most costly and took up $600 of the entire budget, but what a difference they made! Replacing a vanity light fixture is simple. This YouTube Video by The BeefMaster gives a nice tutorial on how to replace a vanity light fixture.
I chose matte black light fixtures from Wayfair and matte black mirrors from Wayfair to replace the original fixtures.
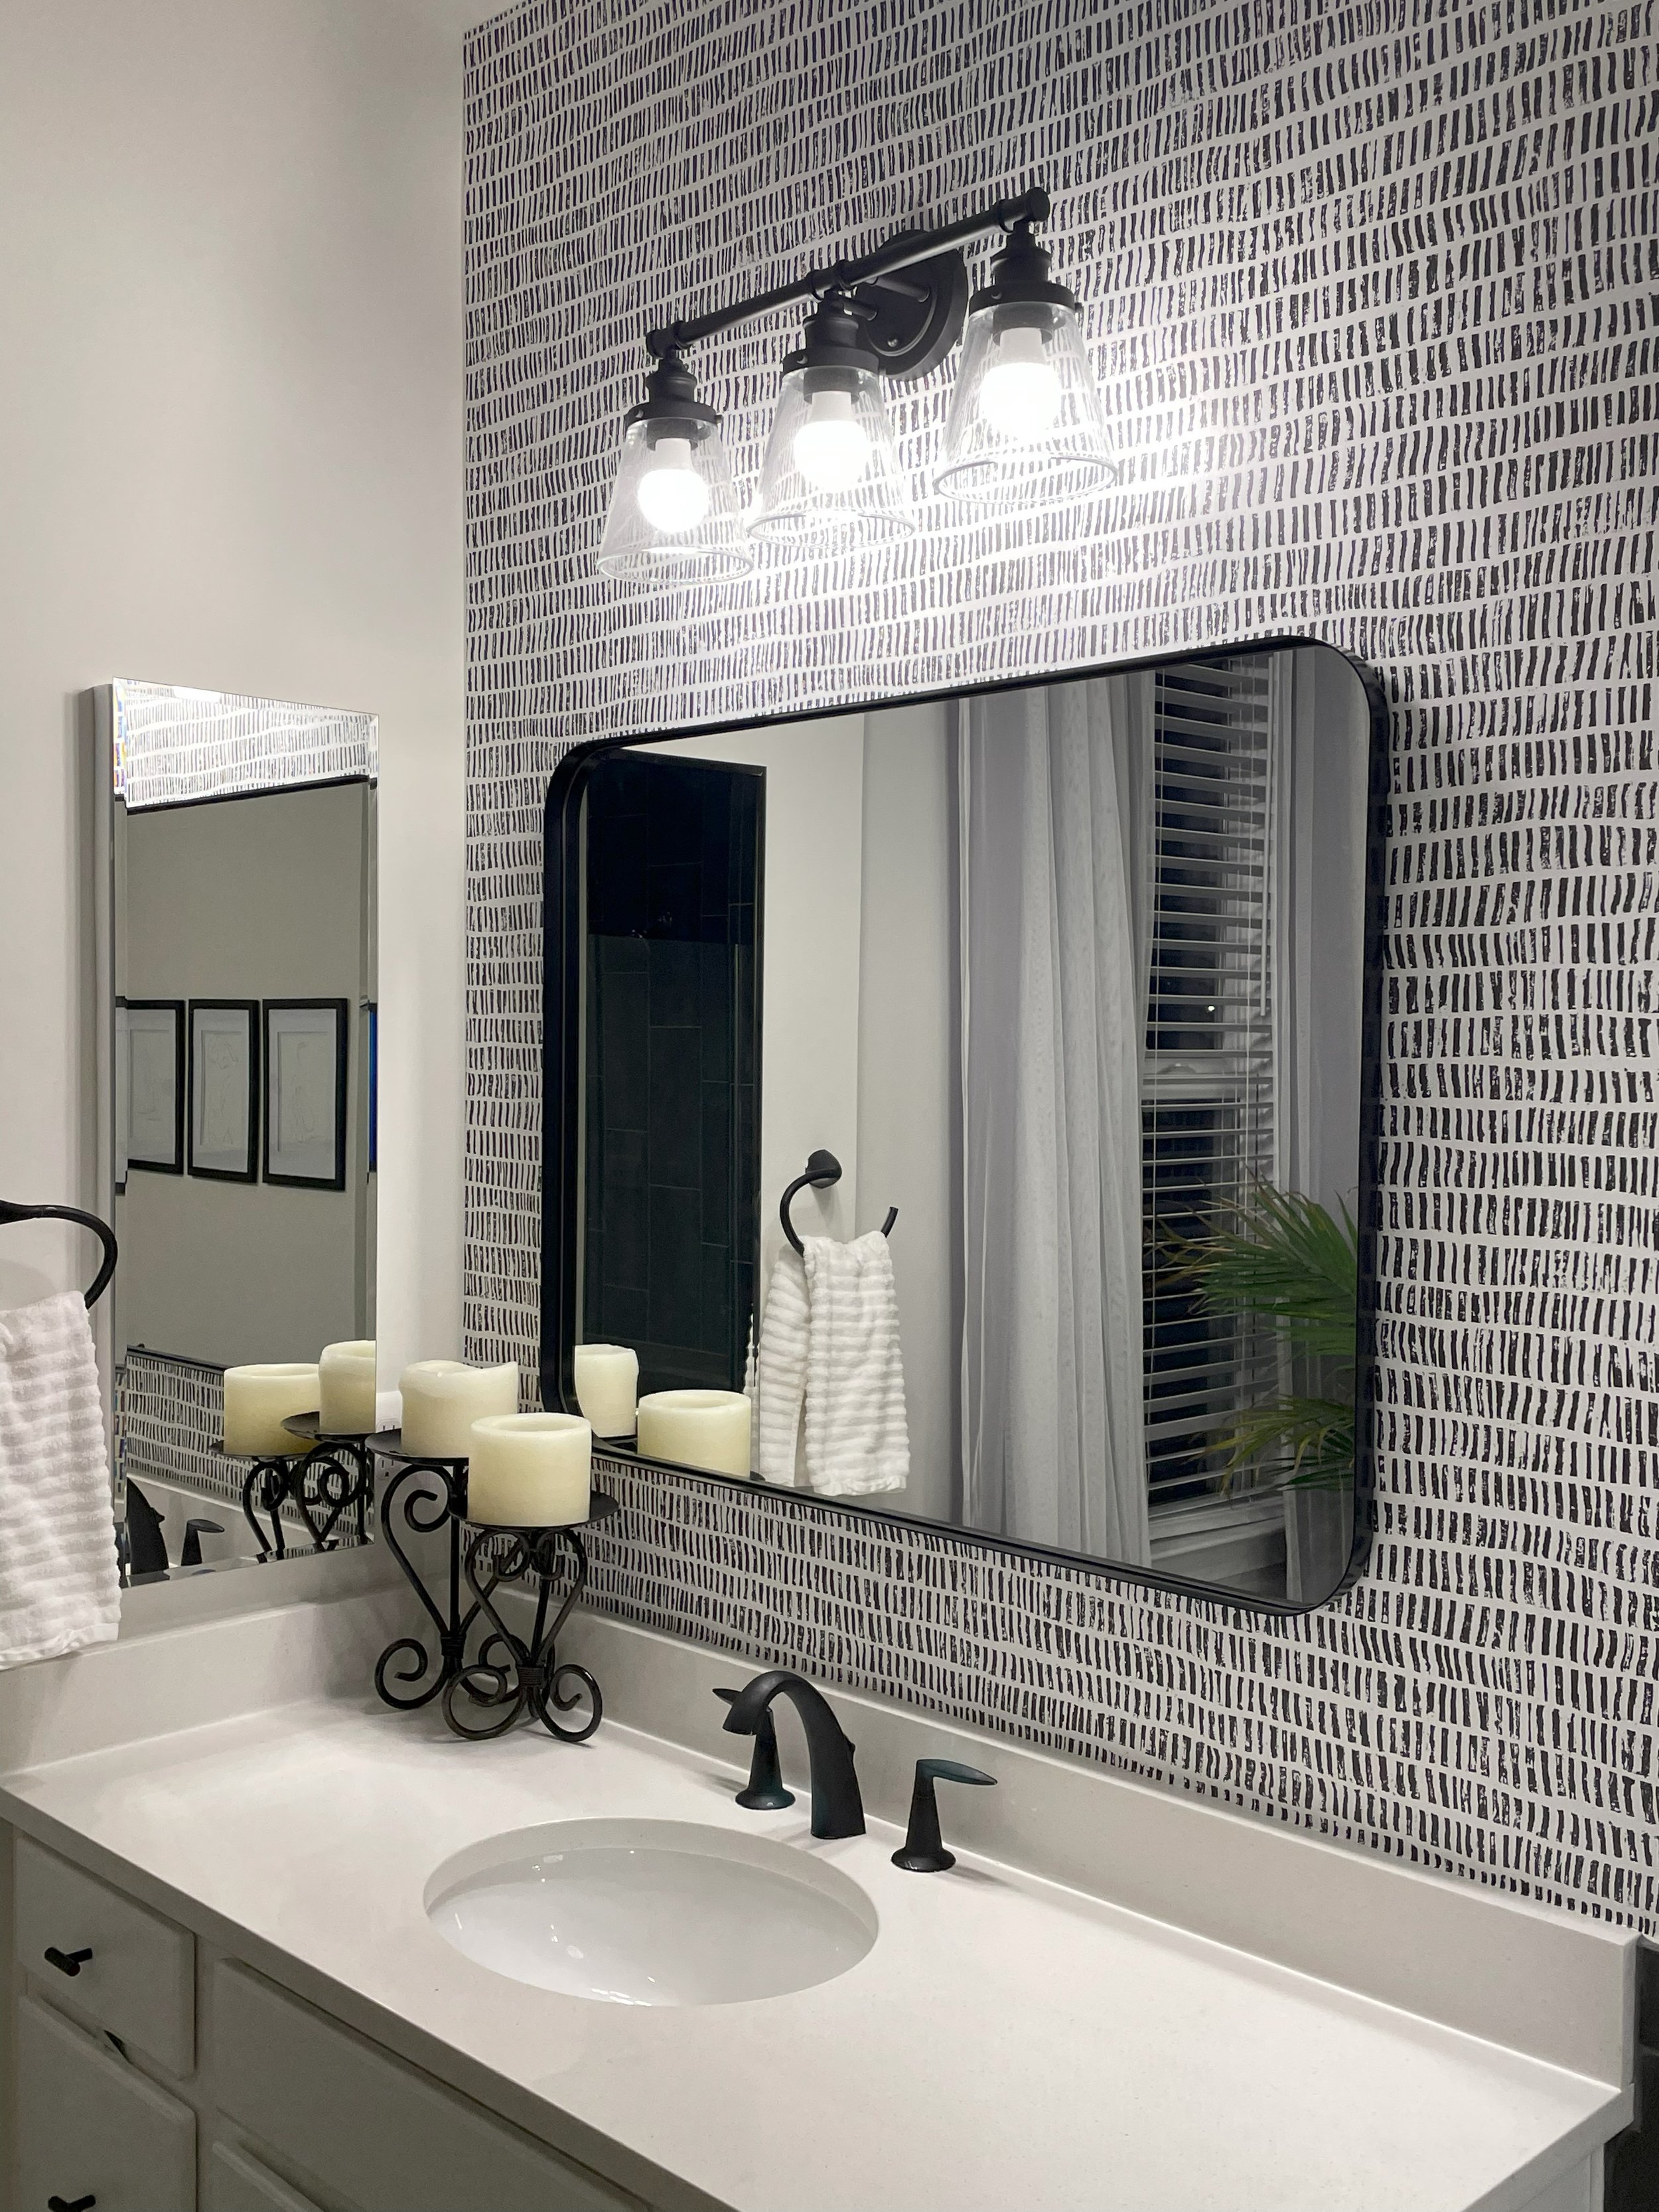
Peel and Stick Wallpaper
Oh boy, I had a hard time with the peel and stick wallpaper.
At first, I chose this patterned peel and stick wallpaper from Wayfair:
Due to the complexity of the pattern and my inexperience, it was really difficult to apply and maintain the spacing as I went along the wall. The paper was thin and difficult to handle. I would not recommend this wallpaper for the beginner wallpaper applier!
For my 2nd attempt, I chose a more forgiving pattern using a peel and stick wallpaper I found on sale at Lowe’s.
For wallpapering, I use the following supplies:

peel and stick wallpaper
wallpaper smoothing tools (I love the large red tool and X-Acto knife pictured to the right. This kit costs $6 on amazon).
RYOBI Laser Cube Compact Laser Level (I love this level for making sure the wallpaper hangs correctly each time).
I think that this YouTube tutorial does a great job showing you the nuts and bolts of how to hang peel and stick wallpaper.
Wooden Feature Wall
There was an interesting inset wall that I thought wound be great for a wooden feature wall with towel hooks. I used furring strip from Home Depot to create a simple wooden feature wall. Furring strip is super cheap! The only downside is that each board has its own flaws and imperfections. With wood filler, caulk, and sanding, the finished look can turn out very sharp and professional while being really budget friendly compared to other common boards.
Supplies to create a wooden feature wall:
construction adhesive
caulk
nails, nail gun, and air compressor
sander
paint
I got matte black towel hooks from home depot to complete the look.
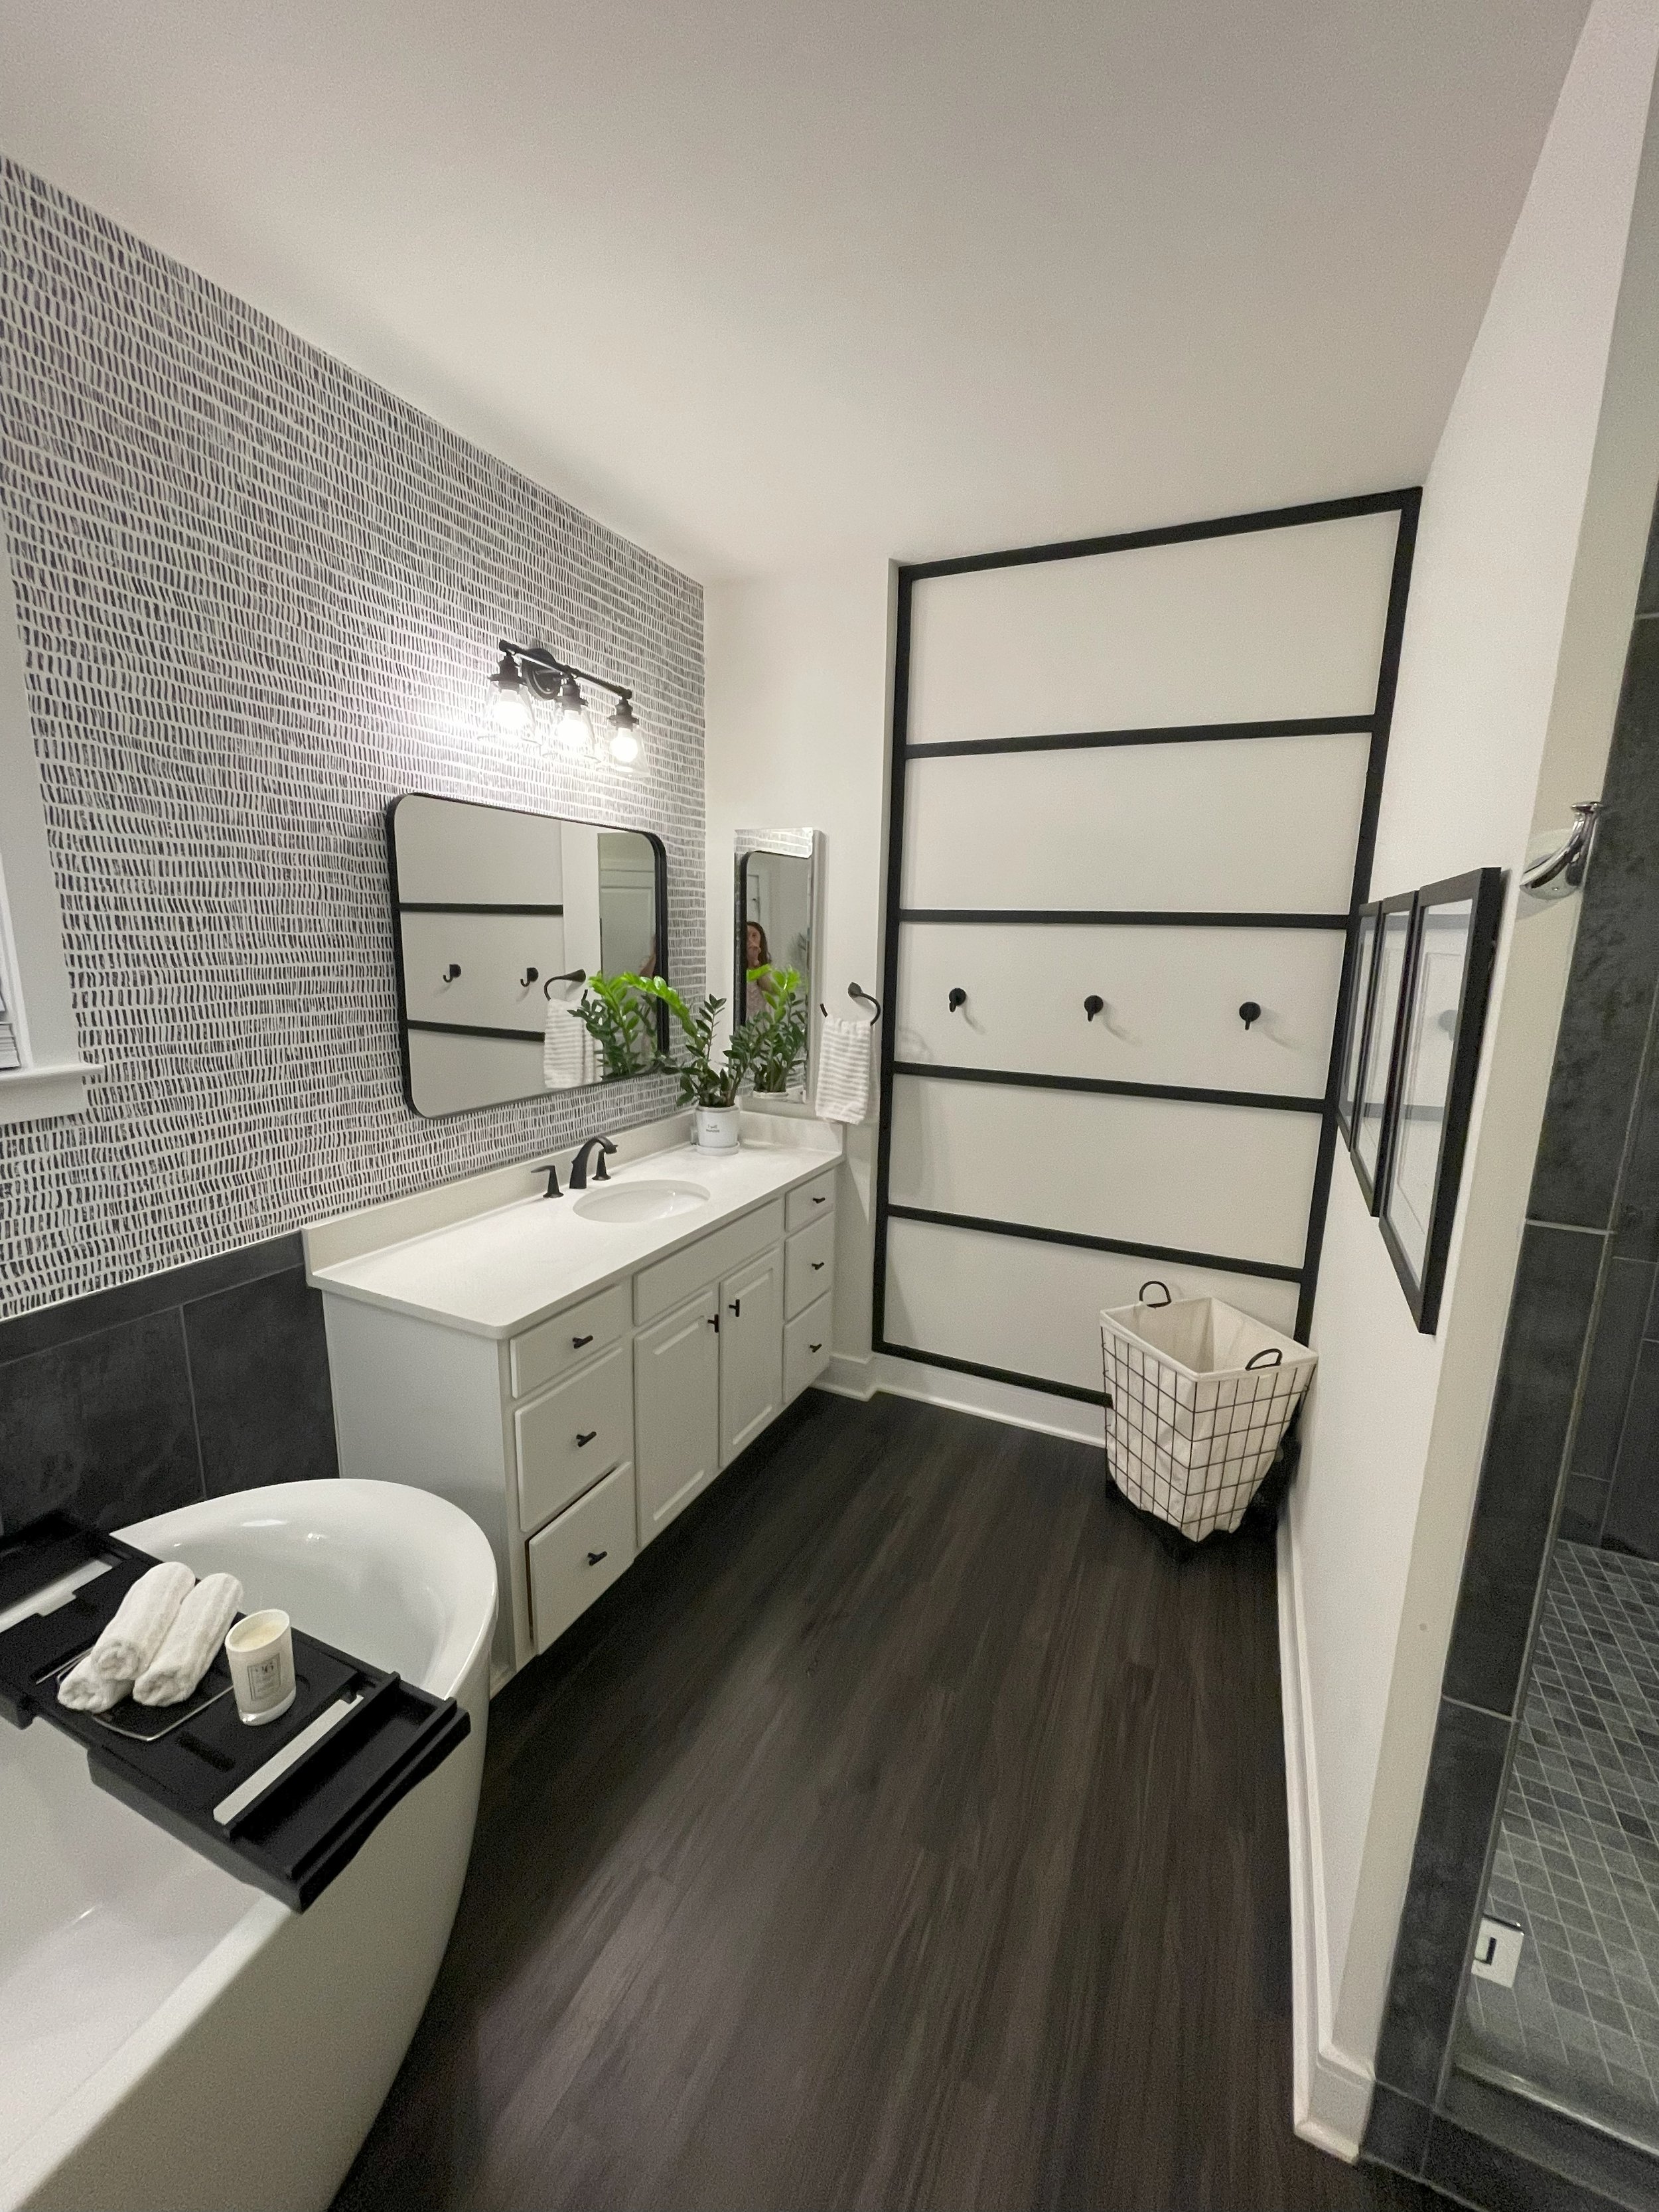
And of course, you know I love to finish a room with a little style from Sand & Pine Co.! I absolutely love how the products create that comfy, cozy feel.

Our Home Fragrance products, dough bowls, towels, and magnifying glasses.

And who doesn’t like a good before and after video? Check out our instagram, facebook, and TikTok for before and after videos.
Let me know what you think in the comments and share any tips or tricks you have!
The DIY Doctor :-)